Picture this scenario: It’s January, snow covers the ground outside, and while your neighbors are ordering from grocery stores, you’re walking down into your backyard to harvest fresh lettuce, vibrant herbs, and ripening tomatoes. The temperature inside hovers around 60 degrees Fahrenheit despite the freezing air above. No heating bill. Just the earth doing what it does best—keeping things stable.
This is the promise of a walipini greenhouse, an underground growing structure that has helped farmers defy harsh climates for decades. But before you grab a shovel and start digging, there’s more to this earth-sheltered growing system than meets the eye.
What Is a Walipini Greenhouse?
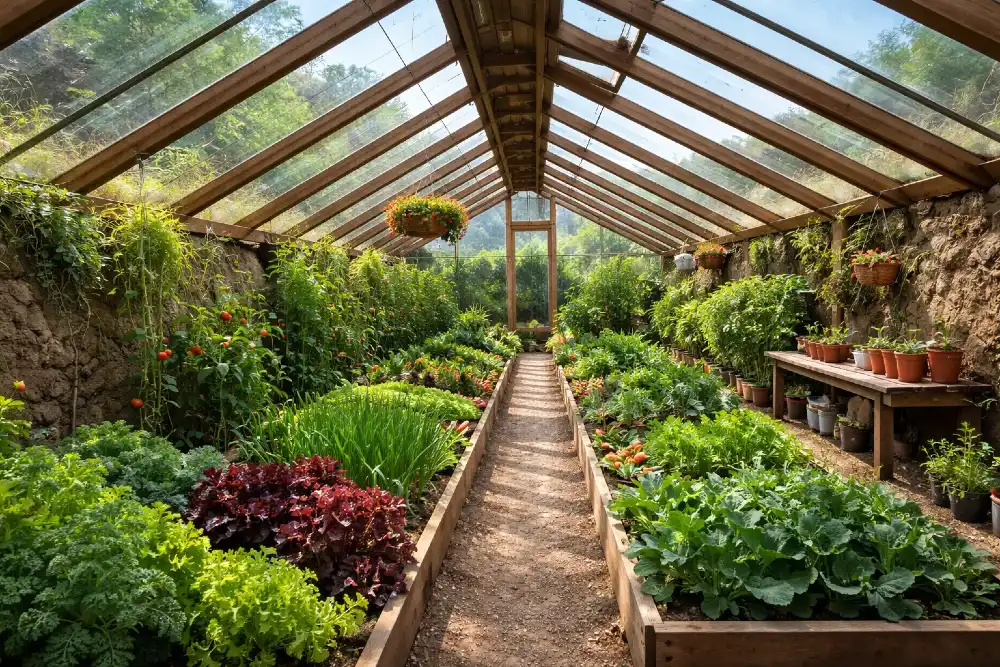
A walipini is an underground or earth-sheltered greenhouse that harnesses both solar and geothermal energy to create stable growing conditions throughout the year. The term comes from the Aymara language, spoken in the Andes Mountains of South America, where it translates to “place of warmth.”
Unlike traditional greenhouses that sit above ground with transparent walls on all sides, a walipini is excavated 6 to 8 feet into the earth. The structure features earthen walls that provide natural insulation, while a transparent roof—typically made of polycarbonate panels or plastic sheeting—allows sunlight to penetrate and warm the growing space.
The concept isn’t entirely new. Victorian British gardeners used similar “pineapple pits” to grow exotic fruits in cold climates, and Russian farmers experimented with underground structures for citrus cultivation in frigid conditions. However, the modern walipini design gained prominence in the 1990s when volunteers from the Benson Agriculture and Food Institute traveled to La Paz, Bolivia, to help high-altitude farmers grow food year-round in harsh mountain conditions.
The Science Behind Underground Growing
The fundamental principle that makes walipini greenhouses work is thermal mass and geothermal stability. Below the frost line—typically 3 to 4 feet deep in most climates—the earth maintains a relatively constant temperature of 50 to 60 degrees Fahrenheit year-round, regardless of surface weather conditions.
This underground temperature stability creates what’s known as an 8-week lag time in temperature changes. When surface temperatures plummet in winter or soar in summer, the soil several feet down remains moderate and consistent. By placing your growing space in this stable thermal zone, you’re essentially tapping into a free, natural climate control system.
The transparent roof serves a dual purpose. During daylight hours, it allows solar radiation to enter the structure, warming both the air and the thermal mass materials inside (such as water barrels, stone walls, or the earth itself). These materials absorb heat during the day and gradually release it at night, smoothing out temperature fluctuations that would kill tender plants in a traditional greenhouse.
The result is remarkable temperature stability. While conventional greenhouses can experience temperature swings of 40 to 50 degrees between day and night, a well-designed walipini maintains much narrower fluctuations—typically within 10 to 15 degrees. This consistency translates to healthier plants, extended growing seasons, and dramatic energy savings.
Energy Efficiency and Cost Savings
The energy efficiency of walipini greenhouses sets them apart from conventional structures. Research indicates that underground greenhouses can achieve energy savings of 70 to 90 percent compared to heated above-ground greenhouses.
According to industry data, the average cost of heating a traditional greenhouse runs approximately $25 per square foot annually. In contrast, a properly designed walipini costs between $6 and $12 per square foot to heat—a reduction of more than 50 percent even in the higher range. For many growers, especially those in cold climates where heating costs can become prohibitive, this difference represents the viability of year-round growing versus shutting down for winter.
The protection from wind is another often-overlooked efficiency factor. Traditional greenhouses lose significant heat through wind chill on their exposed walls. Because a walipini’s walls are underground, they’re completely protected from wind, eliminating this major source of heat loss.
The Reality of Walipini Construction Costs
One of the most persistent myths circulating about walipini greenhouses is that you can build one for $250 to $300. This figure originated from the original Bolivian project, which used volunteer labor, recycled materials, and simple construction techniques suitable for that specific climate near the equator.
The reality for most North American builders is substantially different. A small 10×10 foot walipini built with reclaimed materials and DIY labor typically costs between $300 and $500, but this excludes permits, professional drainage installation, and reinforced walls. A more realistic budget for a durable, properly engineered structure ranges from $15 to $40 per square foot, depending on your location and materials.
For a 10×20 foot walipini—a common starting size—you should budget $2,000 to $6,000 when accounting for all necessary components:
Excavation costs: Professional excavation with machinery typically runs $500 to $2,000, depending on soil type and access to your site. While you could theoretically dig by hand, excavating a 6 to 8 foot deep pit that’s 10×20 feet would require months of labor.
Materials: Polycarbonate glazing panels cost significantly more than plastic sheeting but last decades longer. Structural framing, whether wood or metal, adds to the budget. Insulation materials for walls range from affordable straw bales to more expensive rigid foam boards.
Drainage systems: Critical for preventing structural failure, proper drainage with gravel, pipes, and potentially a sump pump can cost $500 to $1,500.
Reinforcement: Depending on your soil type, you may need concrete blocks, wooden framing, or even poured concrete walls to prevent collapse—potentially adding $1,000 to $3,000 to your project.
The good news is that these upfront costs are offset by dramatically lower operating expenses. The break-even point depends on your climate, what you grow, and how much you’d otherwise spend on heating, but many growers report recovering their investment within 3 to 5 years through reduced energy costs and increased food production.

Critical Design Considerations for North American Climates
Here’s where many aspiring walipini builders encounter their first major obstacle: the original Bolivian design simply doesn’t work well in most North American locations. The reason comes down to solar angles and latitude.
La Paz, Bolivia sits at 16 degrees south of the equator, where the sun remains high in the sky year-round. Even during their winter solstice, the sun reaches approximately 50 degrees off the horizon at solar noon. This high angle means sunlight can easily penetrate a relatively flat roof and illuminate the floor of a sunken greenhouse.
Compare this to Denver, Colorado, at 40 degrees north latitude. During winter solstice, the sun only reaches 26 degrees off the horizon at solar noon. If you dig a 6 to 8 foot hole and cover it with a shallow roof, the low winter sun simply cannot reach the growing beds. Instead, the northern wall casts a deep shadow across the entire floor, making winter growing nearly impossible.
This fundamental problem explains why many North American walipini attempts fail despite following the original design precisely. The structure that works brilliantly near the equator becomes a shaded pit at higher latitudes.
Solving the Solar Angle Problem
Fortunately, several design modifications can adapt walipinis for northern latitudes:
Steeper roof angles: Instead of the shallow 20 to 25 degree pitch used in Bolivia, northern walipinis need roof angles of 35 to 50 degrees to capture low winter sun. You can calculate the optimal angle for your location using tools like SunCalc or NOAA’s solar position calculator, then design your roof accordingly.
Earth berms: Building up the northern side of your walipini with soil creates a steeper slope without excessive excavation on the southern side. This earth berm also provides additional insulation and wind protection.
Shallower excavation: Rather than digging the full 8 feet deep, consider a 4 to 5 foot depth in northern climates. You’ll sacrifice some geothermal benefit, but you’ll gain crucial sunlight penetration during short winter days.
Stepped floors: Some advanced designs incorporate different floor levels, with deeper areas in the front for walkways or storage, and raised beds in the back that catch maximum sunlight.
The Drainage Challenge: Don’t Underestimate Water
If solar angles are the first major obstacle for North American walipini builders, water management is the second—and potentially more devastating if ignored.
When you excavate below ground level, you’re creating a natural collection point for water. Rain that runs off your roof, groundwater that seeps through soil, and even humidity condensation inside the structure all seek the lowest point: your growing beds. Poor drainage doesn’t just create muddy conditions—it can cause catastrophic structural failure.
In areas with wet seasons, water runoff from the roof can easily penetrate the soil and erode earthen walls, causing them to crumble or collapse entirely. This problem intensifies during freezing winters with heavy snow loads, when your walls face both water intrusion and expansion from ice formation. Add the weight of snow accumulation on your roof, and you have a recipe for structural failure.
Essential Drainage Solutions
Before breaking ground, conduct a simple drainage test. Dig a 12-inch hole at your proposed site and fill it with water. If it doesn’t drain completely within 24 hours, you have poor drainage that will require intervention.
Gravel base: Start with a 6 to 12 inch layer of gravel across the entire floor. This provides immediate drainage under your growing beds and walkways.
Perimeter drains: Install perforated drainage pipes around the outside perimeter of your walipini, sloping away from the structure to carry water to a discharge point well away from your walls.
Sump pump systems: In areas with high water tables or persistent moisture issues, a small sump pump in the lowest corner can be a lifesaver, automatically removing water before it becomes problematic.
Waterproof barriers: Apply pond liner, roofing membrane, or thick plastic sheeting to your berms and integrate it with your roofing design to prevent surface water from penetrating the soil around your structure.
Sloped floors: Design your floor with a slight slope—even just 1 to 2 percent grade—toward drainage points to prevent water pooling.
Roof water management: Install gutters to capture roof runoff and direct it to storage tanks or away from the structure. Ensure overflow systems can handle heavy rain events without flooding your entrance.
Understanding your soil type is equally critical. Clay soils hold water tenaciously, making them heavy and prone to collapse without proper reinforcement, yet they provide excellent structural support when dry. Sandy soils drain quickly but offer poor stability and can shift under weight. Clay loam—a mixture of clay, sand, and organic matter—often provides the best balance of drainage and structural integrity.
Structural Integrity and Wall Design
The original Bolivian walipini used simple rammed earth walls without interior framing. While this works in dry climates with stable soil, it creates a short-lived structure in most North American conditions. Nature abhors a vacuum, and without interior framing and reinforcement, earthen walls will erode or collapse depending on your soil and climate.
Several proven construction methods provide long-term durability:
Post and beam framing: The most common approach uses pressure-treated wood posts set in concrete piers several feet deep, creating a sturdy frame. The greenhouse walls are then built around this framework, which resists the lateral pressure of surrounding soil.
Concrete block walls: Stacked and reinforced concrete blocks provide excellent support and can incorporate insulation between the blocks and the earth. While more expensive upfront, they offer decades of maintenance-free service.
Poured concrete retaining walls: For the ultimate in durability, especially in wet or unstable soil conditions, poured concrete walls with proper reinforcement can withstand significant lateral pressure and moisture intrusion.
Earthbag construction: A more sustainable option uses bags filled with soil and stacked to create thick walls that provide both structure and insulation. This technique requires more labor but uses inexpensive, natural materials.
Timber framing with insulation: Wood framing with rigid foam insulation boards creates insulated walls that significantly improve temperature stability beyond what bare earth provides.
That last point deserves emphasis: contrary to popular belief, bare earth walls don’t provide exceptional insulation. The perceived benefit of earth-sheltered construction comes primarily from temperature stability, not insulation value. Soil has an R-value of approximately R-1 per foot—far less than even mediocre conventional insulation.
To truly maximize the efficiency of your walipini, install rigid foam insulation boards (polystyrene or blue board, rated for underground use) between your framing and the earth. This prevents the relatively warm interior from constantly losing heat to the cooler surrounding soil, especially during early winter before the thermal mass has had time to warm up from summer sun.
Ventilation, Humidity, and Air Quality
The enclosed nature of underground greenhouses creates unique challenges for air circulation and humidity control. Unlike traditional greenhouses where you can simply open multiple walls to create cross-ventilation, walipinis require more thoughtful ventilation design.
Natural ventilation systems: The most reliable approach uses passive stack ventilation. Install low vents near the floor on the south side (where cooler air enters) and high vents near the peak of the north wall (where warm air exits). This creates natural convection currents that circulate air without electricity.
Adjustable vents: Install vents with manual or automatic openers that respond to temperature changes. Automatic vent openers use wax-filled cylinders that expand when warm, pushing the vent open—no electricity required.
Humidity management: Excess humidity promotes disease and can damage plants. Beyond ventilation, several strategies help control moisture:
- Water plants in the morning rather than evening, allowing excess moisture to dissipate during the day
- Use drip irrigation rather than overhead watering to minimize airborne moisture
- Install dehumidifiers in climates with persistent humidity issues
- Monitor humidity with digital meters and adjust ventilation accordingly
Air quality concerns: Underground spaces can accumulate gases that pose health risks. Radon, a naturally occurring radioactive gas, seeps from soil and can concentrate in enclosed below-grade spaces. Before building, test your property for radon levels. If present, ensure your ventilation system creates positive air pressure and includes a radon mitigation strategy.
Carbon dioxide from decomposing organic matter and plant respiration can also accumulate in poorly ventilated underground spaces. Good ventilation solves this problem while also providing the air circulation that plants need for healthy growth.
Lighting Challenges and Solutions
Even with optimal solar design, walipinis in northern latitudes face lighting challenges during short winter days. The combination of low sun angles, shorter day length, and potential shading from surrounding features can limit natural light to levels inadequate for many crops.
Supplemental LED lighting: High-efficiency LED grow lights provide full-spectrum light for a fraction of the electricity cost of older technologies. Install them on timers to extend day length to 12 to 16 hours during winter months.
Reflective surfaces: Paint interior walls white or cover them with reflective mylar sheeting to bounce available light onto plant surfaces. This simple technique can increase effective light levels by 20 to 30 percent.
Glazing maintenance: Dirt, dust, and algae growth on transparent roofing can reduce light transmission by 30 percent or more. Clean glazing panels thoroughly each fall and spring with a mild vinegar solution.
Strategic crop selection: Focus on crops that tolerate lower light levels during winter. Leafy greens like lettuce, spinach, kale, and Asian greens thrive with less light than fruiting crops like tomatoes and peppers. Save the sun-loving plants for spring through fall when natural light is abundant.
Climate Suitability: Where Walipinis Work Best
Despite the romanticized notion that walipinis work everywhere, the reality is more nuanced. These structures perform best in specific climate conditions:
Ideal zones: USDA hardiness zones 4 through 8 see the greatest benefit, where winters are cold enough to make year-round growing challenging but not so severe that the ground freezes deeply. Much of the West Coast, parts of the Southwest, and moderate winter areas in the Midwest and Northeast fall into this category.
High-altitude, dry climates: The original Bolivian environment—high elevation with dry air and cold nights but strong sun—remains ideal. Similar climates in the western United States work exceptionally well.
Problematic conditions: Walipinis struggle in:
- Extreme northern latitudes where winter sun angles are too low and day length too short
- Areas with very high water tables or poor drainage
- Locations with heavy, extended rainy seasons that cause erosion
- Flat terrain near the equator where the geothermal benefit is minimal
Real-world experience from growers confirms these patterns. Successful walipini operations in Idaho, Colorado, and Montana demonstrate the concept’s viability in cold, dry climates. Meanwhile, attempts in Wisconsin, Minnesota, and other northern locations with winter sun angles below 25 degrees often report disappointing results unless significant modifications are made.

Practical Growing Tips for Walipini Success
Once your walipini is built and operational, certain practices maximize productivity:
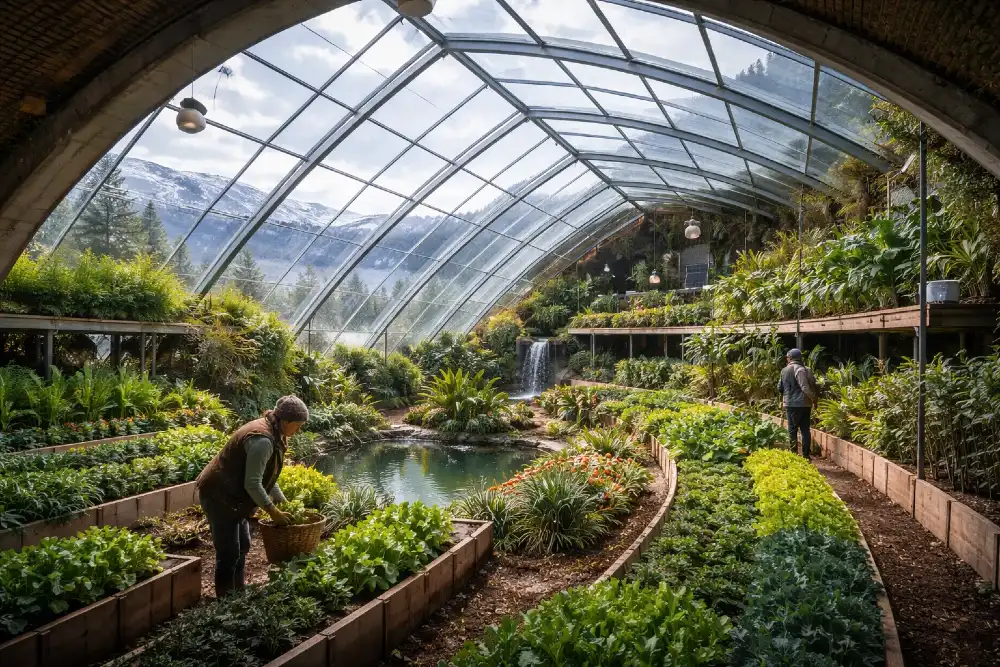
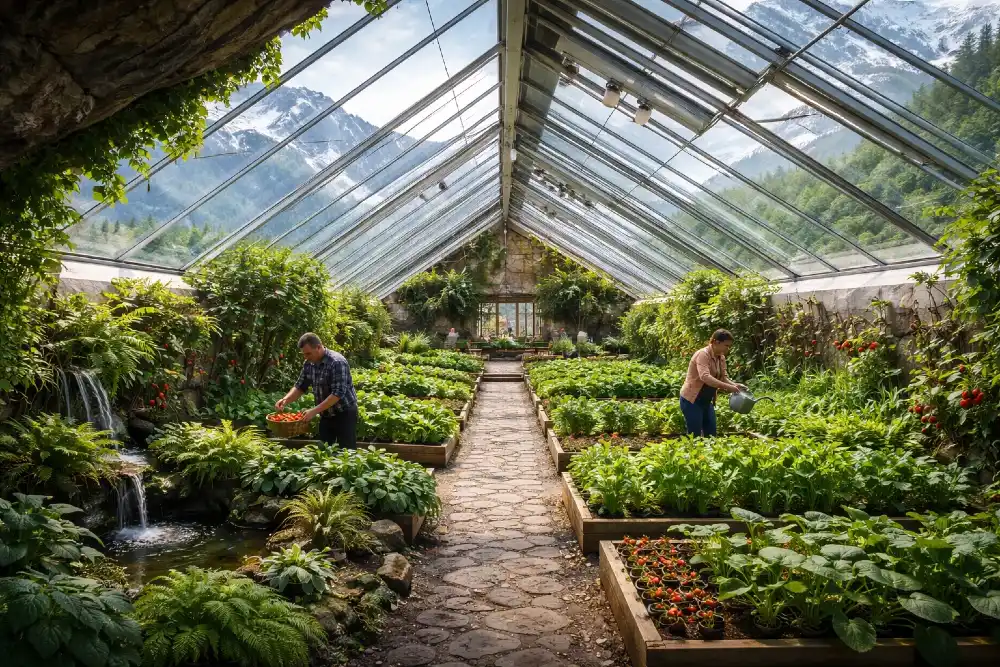
Thermal mass optimization: Place water barrels, preferably painted black, along the north wall where they receive maximum sun exposure. These barrels absorb heat during the day and radiate it back at night, moderating temperature swings. As a bonus, they provide stored water for irrigation.
Crop rotation: Even in protected environments, practice crop rotation to maintain soil health and prevent disease buildup. The year-round growing capability of walipinis can actually accelerate soil depletion if you’re not mindful about fertility management.
Temperature monitoring: Install digital thermometers with min/max memory at both floor level and at plant height. This data helps you understand actual growing conditions and make adjustments before problems arise.
Succession planting: Take advantage of your extended season by succession planting—sowing small amounts of crops every two weeks rather than one large planting. This provides continuous harvests throughout the year.
Winter preparation: Even though walipinis maintain warmer temperatures than outside, winter still requires preparation. Add extra thermal mass before cold weather arrives, clean glazing to maximize light transmission, and ensure ventilation systems are working properly.
Summer cooling: The same earth that keeps you warm in winter can make summers uncomfortably hot. Install shade cloth over the glazing during peak summer months, increase ventilation, and focus on heat-tolerant crops.
Common Problems and Solutions
Understanding potential issues before they arise saves significant time and frustration:
Problem: Greenhouse stays too cold at night despite mild exterior temperatures.
Solutions: Insufficient thermal mass is the usual culprit. Add more water barrels along the north wall, verify that glazing is properly sealed using an infrared thermometer to find cold spots, and consider adding thermal blankets to drape over the glazing on the coldest nights. If using single-layer plastic, upgrade to double-layer or polycarbonate panels.
Problem: Excessive condensation dripping on plants.
Solutions: This indicates high humidity meeting cold glazing surfaces combined with poor ventilation. Increase air circulation even in winter by cracking vents open during midday, ensure glazing slopes adequately (minimum 30 degrees), install collection gutters at the lower glazing edge, water in the morning rather than evening, and reduce total water use.
Problem: Plants wilting despite moist soil.
Solutions: Root rot from overwatering or poor drainage causes this condition. Check that drainage systems aren’t clogged and that water isn’t accumulating in low spots. Dramatically reduce watering frequency, pull affected plants, improve drainage, and let soil dry substantially before replanting.
Problem: Everything grows slowly with pale, weak growth.
Solutions: Insufficient light, especially in winter, causes this symptom. Install supplemental LED grow lights on 12 to 14 hour timers, clean glazing thoroughly (dirt can reduce light transmission by 30 percent), verify that trees or structures aren’t shading the greenhouse during peak sun hours, and consider reflective white paint or mylar on the north wall to bounce light onto plants.
Problem: Temperature spikes above 100 degrees on sunny spring or fall days.
Solutions: Insufficient ventilation is the cause. Add more automatic vent openers or larger exhaust fans, verify that vents are actually opening (automatic openers can fail), create additional ventilation openings if needed, and consider installing shade cloth during the transition seasons.
Making the Decision: Is a Walipini Right for You?
After examining the realities of walipini construction and operation, how do you decide if this approach makes sense for your situation?
Build a walipini if you:
- Live in USDA zones 4 through 8 with cold winters but adequate winter sun
- Have well-draining soil or the budget to install proper drainage
- Want to dramatically reduce greenhouse heating costs
- Have access to excavation equipment or the budget to hire professionals
- Are committed to year-round food production
- Have a south-facing slope or space to build earth berms
- Enjoy building projects and don’t mind the complexity of underground construction
Choose a traditional greenhouse if you:
- Live at very high northern latitudes with extremely low winter sun
- Have a high water table or very poor drainage
- Want a simple, quick installation
- Need maximum flexibility to move or modify your structure
- Prefer conventional construction methods
- Have limited budget for a complex project
- Want to grow primarily fruiting crops that need maximum light
Consider alternative designs if you:
- Live in wet climates with erosion concerns: Look into above-ground passive solar greenhouses with earth berms rather than full excavation
- Face severe cold but have budget: Deep winter greenhouses developed by the University of Minnesota use insulated walls and thermal batteries without excavation
- Want some geothermal benefit without full excavation: Partially sunken designs that go down 2 to 3 feet capture some thermal stability while avoiding many drainage and light issues
The Path Forward
The walipini represents an elegant application of passive solar design and earth-sheltered construction principles to food production. When designed appropriately for your specific latitude, climate, and soil conditions, these underground greenhouses can provide year-round growing capability at a fraction of the operating cost of conventional structures.
However, they’re not a simple or universal solution. The gap between online claims of $300 construction costs and the reality of proper engineering can discourage builders who encounter unexpected challenges. The original Bolivian design requires significant modification to function in most North American locations. And the excavation, drainage, and reinforcement requirements represent substantial upfront investment in both money and labor.
Success with walipinis comes from clear-eyed assessment of your specific conditions, honest budgeting, willingness to modify standard designs for your latitude, and commitment to proper construction rather than shortcuts. When approached with appropriate preparation and realistic expectations, a walipini can transform your growing season and dramatically reduce your food costs for decades.
The question isn’t whether walipinis work—they demonstrably do in appropriate conditions. The question is whether the specific design modifications required for your location make sense compared to alternative greenhouse approaches. For many growers in zones 4 through 7 with good drainage and commitment to the project, the answer is a resounding yes. For others, a different path to year-round growing might prove more practical.
What’s certain is that the fundamental principles behind walipini greenhouses—thermal mass, passive solar gain, and earth-sheltered construction—offer valuable lessons for anyone seeking to extend their growing season and reduce energy consumption, regardless of which specific structure you ultimately build.
Sources and Further Reading
- Benson Agriculture and Food Institute – Walipini Construction Manual
- Ceres Greenhouse Solutions – Walipini Greenhouse Considerations: https://ceresgs.com/the-walipini-low-down/
- Mother Earth News – Tips for Walipini Construction: https://www.motherearthnews.com/organic-gardening/essential-tips-for-building-a-durable-walipini-greenhouse-zbcz1706/
- Verge Permaculture – Modified Walipini Design: https://vergepermaculture.ca/robs-modified-walpini/
- Craft Camp – Walipini Greenhouse Complete Guide: https://craft.camp/blog/walipini-greenhouse/
- VegoGarden – Growing Underground Walipini Greenhouses: https://www.vegogarden.com/blogs/academy/growing-underground-walipini-greenhouses
- Morning Chores – How to Build a Walipini Greenhouse: https://morningchores.com/walipini/
- Charley’s Greenhouse – Walipini Underground Greenhouses: https://charleysgreenhouses.com/news/walipini-underground-greenhouses/
- Horti Generation – Underground Greenhouse Walipini Concept: https://horti-generation.com/underground-walipini-greenhouse/
- BC Greenhouses – Underground Greenhouses and Walipini Foundations: https://info.bcgreenhouses.com/en-ca/en-ca/walipini-underground-greenhouses
Related posts:
 RORRA Water Filtration System Review: How It Works and Who It’s For
 Our Place Titanium Pro Cookware Set: Andrew Huberman’s Recommended PFAS-Free, NoCo® Technology Cookware Revolution
 Sun Tzu’s Path to Peace: Mastering Yourself Before Attempting to Master Love
 Sun Tzu’s Art of War: Why Pattern Recognition Beats Promises in Modern Dating
 How Sun Tzu’s Art of War Reveals Psychology Dynamics of Modern Dating